
Knocked Flat: What to Do When VDOT Takes Out Your Mailbox
Knocked Flat: What to Do When VDOT Takes Out Your Mailbox
A winter snowstorm rolls through Virginia, the plows roar past, and once the rumble fades, you step outside to find your mailbox post snapped in half or lying flat in the ditch.
Whether it was a plow blade during a blizzard or a ditch-mowing crew in mid-July, mailboxes in the state right-of-way take a beating. If the Virginia Department of Transportation (VDOT) or one of its contractors was the culprit, here is exactly how to handle the situation step-by-step to get your mailbox repaired or reimbursed.
1. Document the Scene Immediately
Before you pick up the post, shovel it out, or head to the hardware store, pull out your phone and take clear photos from multiple angles:
Tire Tracks and Skid Marks: Document how close the truck wheels came to the shoulder.
Point of Impact: Look for telltale signs of physical contact, such as yellow or orange paint scrapes on the post or crushed metal.
The Entire Setting: Take a wide shot showing the road, your driveway, and where the mailbox sits relative to the curb or pavement edge.
Timestamp Details: Note the date, time, and road conditions. If you have video footage from a doorbell camera or driveway security camera, save and back up the clip immediately.
2. Understand the "Direct Hit" vs. "Thrown Snow" Rule
VDOT maintains thousands of miles of roads, and their liability policy hinges on one critical distinction:
Direct Equipment Contact: If a VDOT plow blade, truck body, or maintenance tractor physically struck your post or box, VDOT is generally responsible for repair or replacement.
Snow Force / Wet Slush: If heavy, compacted snow thrown from a plow knocked over a mailbox that was already rotted, loose, or improperly installed, claims are frequently denied. Road crews cannot control the weight of flying snow when clearing travel lanes.
Having clear photographic evidence of paint scuffs or fractured wood showing direct impact makes a major difference in getting your claim approved.
3. File a Report with VDOT
Do not wait weeks to report the incident. Contact VDOT customer service as soon as the weather clears and road crews finish primary routes:
Online: Submit a work request directly via the my.vdot.virginia.gov portal. Select property damage/roadside maintenance and upload your photos and details.
Phone: Call the 24/7 VDOT Customer Service Center at 1-800-FOR-ROAD (1-800-367-7623).
When you submit the report, provide your exact street address, the county or residency district, the date and approximate time the damage occurred, and whether the vehicle was marked as VDOT or a private contractor (many neighborhood plows are hired third-party contractors). Request a tracking/service request number before ending the call or closing the form.
4. Know What VDOT Will (and Won't) Replace
If VDOT accepts responsibility, understand how the resolution typically works:
Standard Issue Replacements: VDOT maintenance crews will generally install a standard 4x4 wooden post and a basic black or white metal/plastic mailbox at no charge.
Custom or Decorative Boxes: If you had an ornamental brick enclosure, custom stonework, or an expensive wrought-iron setup, VDOT will not rebuild a custom brick monument. In fact, heavy masonry mailboxes are often considered roadside safety hazards in the state right-of-way.
Reimbursement Option: If you prefer to replace the post yourself or install a specific model, ask the claims representative about filing a formal tort/property damage claim for reimbursement up to state or district allowances. Keep all receipts for lumber, fasteners, and the box.
5. Reinstall to Meet USPS and VDOT Standards
Whether VDOT replaces it or you rebuild it yourself, ensure the new installation follows standard safety guidelines to prevent future run-ins:
Height: Mount the box so the bottom sits 41 to 45 inches above the road surface.
Setback: Set the face of the mailbox back 6 to 8 inches from the curb or edge of the pavement.
Post Support: Use a 4x4 pressure-treated wooden post or a 2-inch diameter standard steel pipe buried no deeper than 24 inches. Avoid oversized posts, concrete-filled metal pipes, or stone pillars, as these pose severe collision hazards to passing motorists and violate right-of-way regulations.
If mail delivery is interrupted while you wait for repairs, set up a temporary bucket-mounted box if your carrier allows it, or pick up your mail directly from your local post office branch.
What to Do When an Amazon Delivery Van Takes Out Your Mailbox
What to Do When an Amazon Delivery Van Takes Out Your Mailbox
A loud crunch at the curb, a flash of prime-blue sheet metal driving away, and your mailbox is suddenly lying flat in the grass.
Delivery drivers are under intense schedule pressure, and accidents happen—especially when navigating tight cul-de-sacs and crowded driveways. If an Amazon van just took out your mailbox, getting it repaired or replaced comes down to handling the paper trail quickly and properly.
1. Document the Scene Immediately
Before moving debris or attempting a temporary fix, pull out your phone and gather evidence:
Photos and Video: Capture wide shots of your property line, tire tracks in the turf, the broken post, the street layout, and close-ups of any paint transfer.
Camera Footage: Check your doorbell camera, exterior security systems, or dashcams. If you don't have footage, ask your immediate neighbors if their cameras caught the delivery window.
Driver & Vehicle Details: If the driver stopped, photograph the vehicle’s license plate, the van’s alphanumeric identification number (usually on the rear doors or front quarter panels), and the company logo on the side.
2. Understand Who Actually Hit You: Amazon vs. DSP vs. Flex
Getting paid requires filing a claim with the correct entity. Most Amazon-branded delivery vans are not owned directly by Amazon Corporate:
Delivery Type
Vehicle Description
Who Handles the Claim
Delivery Service Partner (DSP)
Branded blue Prime vans
Third-party logistics company contracting under Amazon
Amazon Flex
Unmarked personal vehicles
The individual driver’s personal insurance + Amazon Flex policy
Amazon Logistics (Direct)
Branded Prime vans / Freight
Amazon Logistics Corporate Claims (ARC)
If you spoke to the driver, ask for their DSP name and their company's dispatch contact. If the driver left without stopping, Amazon can track the exact vehicle using GPS and package-scan timestamps tied to your address.
3. Contact Amazon Logistics Directly
Do not rely on standard customer support chat on the retail site; front-line retail agents typically handle order returns, not property damage liability.
Call Amazon Logistics Claims
Have your delivery tracking ID ready if you received a package
Contact Amazon Logistics Support (or call standard Amazon Customer Service and request transfer directly to Logistics Property Damage Claims).Open a Property Damage Ticket
Provide the exact date, time, and address. If you received a delivery right before the crash, provide the Tracking ID (TBA number) from the box. This ties your claim directly to the driver's route manifest.Await Contact from ARC or Sedgwick
Amazon typically routes property damage claims through its internal Amazon Resource Center (ARC) or a third-party claims administrator such as Sedgwick. You will receive a claim number via email within 24 to 72 hours.
4. File an Informational Police Report
Mailboxes carry specific legal weight. Federal law (18 U.S.C. § 1705) makes damaging a mailbox a federal offense, and leaving the scene of property damage without notifying the owner or police qualifies as a hit-and-run in most jurisdictions.
Call your local police department’s non-emergency line.
Request an informational incident report.
Having an official police report number significantly speeds up approval from corporate insurance adjusters and discourages third-party contractors from disputing liability.
5. Get Repair Estimates and Handle USPS Requirements
Because mailboxes must meet United States Postal Service placement specifications, you cannot simply stick a post anywhere:
Get Written Estimates: Request 1–2 quotes from local handymen, fence contractors, or masonry specialists (especially if you have a brick or stone mailbox enclosure). Include materials and labor.
Check USPS Regulations: USPS guidelines generally require the bottom of the mailbox to sit 41 to 45 inches above the road surface, set back 6 to 8 inches from the curb edge. Posts should be designed to yield or bend upon vehicle impact (such as a 4x4 wooden post or standard 2-inch thin-wall steel pipe).
Notify Your Local Post Office: If mail cannot be safely delivered while repairs are pending, notify your local carrier or visit the branch to have your mail held for pickup so it isn't returned to sender.
6. Settle the Claim
Once your adjuster reaches out, submit your itemized repair quote, police report number, photos, and video files.
If the DSP or insurance adjuster drags their feet for more than two weeks, follow up with your claim specialist via email to keep an unbroken written record. Amazon requires its DSP partners to maintain comprehensive liability coverage, so as long as your timestamp and damage evidence line up with their route data, the claim is typically paid out via direct deposit or check without having to involve your own homeowner's insurance.
The Mailbox Dilemma: My Neighbor Backed into My Post—Should I Ask Them to Replace It?
It’s the dull thud nobody wants to hear while making morning coffee. You look out the front window, and there it is: your sturdy mailbox post is now listing at a tragic 45-degree angle, tire tracks freshly imprinted on the curb. A quick glance at the driveway across the street reveals a matching scuff on your neighbor’s bumper.
Accidents happen. But once the initial shock wears off, you're left with an awkward dilemma that tests the unspoken social contract of suburbia: Should you ask them to replace it, or just fix it yourself to keep the peace?
The short answer: Yes, you should ask.
Property damage is property damage, and the person responsible is legally and ethically on the hook. However, how you ask makes the difference between a resolved incident and years of icy stares over the hedge. Here is how to navigate the mailbox standoff without starting a neighborhood feud.
1. Document Before You Knock
Before initiating any conversation, gather the facts quietly:
Take photos: Capture the damaged post from multiple angles, the surrounding tire marks, and any debris left behind. If you have clear, timestamped footage from a doorbell camera, save the clip.
Inspect the damage: Is the 4x4 wooden post cracked at ground level, or was the whole assembly just knocked loose in soft soil? Is the actual metal box salvageable?
Price out the repair: A standard pressure-treated wood post and a bag of quick-set concrete cost around $30 to $50 at a home improvement store. A decorative cast-aluminum system or hiring a handyman will run between $150 and $350. Knowing the ballpark figure keeps expectations grounded.
2. Give Them the Benefit of the Doubt (Initially)
There are two primary scenarios here:
1. They don’t realize they hit it. Modern SUVs and trucks are tanks with massive blind spots. If they clipped the post while in reverse at 3 mph, they genuinely might have thought they rolled over a thick branch or a curb.
2. They know, and they’re dreading the confrontation. If they saw what happened, they are likely sitting inside wondering how angry you are.
Assume good intentions first. Approaching the situation with curiosity rather than accusation disarms defensiveness immediately.
3. The Conversation: Warmth First, Facts Second
Skip texting or sliding an invoice under their windshield wiper. A face-to-face chat remains the best way to handle minor neighborhood disputes.
Catch them outside when they are getting the mail or head over during reasonable daylight hours.
How Much Concrete Do i need for a mailbox post?
Setting a mailbox post in rocky, cobble-heavy ground presents a common dilemma: standard formulas assume neat, cylindrical post holes, but digging into shale, ledge, or heavy stone produces irregular, wider cavities.
Here is the exact formula, bag count, and installation technique required to anchor a post in rocky soil without over-buying concrete or creating drainage issues.
The Short Answer: How Many Bags?
For standard rocky soil conditions using a standard 4x4 wood post (or standard steel post) dug to the standard USPS-recommended 24-inch depth:
Standard hole (8–10" diameter, minimal rock blow-out): 1 to 1.5 bags (50-lb fast-setting concrete).
Irregular/blasted hole (10–12" diameter from prying rocks): 2 bags (50-lb fast-setting concrete).
Crushed rock base (mandatory): 1 bag of 3/4" crushed angular drainage stone (about 4–6 inches at the base).
Calculating the Volume: Dirt vs. Rocky Excavation
A post hole in loose loam can be bored with a standard clam-shell digger to a clean 8-inch cylinder. In rocky ground, using a heavy digging bar (spud bar) to pry loose fieldstone or shale typically causes the top or middle of the hole to widen to 10 to 12 inches.
Hole Dimension
Total Hole Volume
Less 4x4 Post Volume (in ground)
Concrete Volume Needed
50-lb Bags (Fast-Setting)
8" Dia. × 20" Depth (after 4" gravel base)
~0.58 cu. ft.
~0.17 cu. ft.
~0.41 cu. ft.
1 bag (~0.37–0.45 cu. ft.)
10" Dia. × 20" Depth (common rocky spread)
~0.91 cu. ft.
~0.17 cu. ft.
~0.74 cu. ft.
1.5 to 2 bags
12" Dia. × 18–20" Depth (heavy rock blow-out)
~1.31 cu. ft.
~0.17 cu. ft.
~1.14 cu. ft.
2.5 to 3 bags
Pro-Tip on Rock Formations: Never pour concrete into an unmeasured, jagged void. If prying a boulder leaves an excessively wide 14–16" cavity, do not fill the entire crater with concrete. Backfill the excess outer void with dense crushed stone and compacted native rock fines, reserving only an 8–10" collar around the post for the pour.
The Rocky Ground Concrete Strategy
1. The 4–6 Inch Drainage Bed Is Non-Negotiable
Rocky terrain often traps standing subsurface runoff around the post. Never encase the bottom of a wooden post in a solid "concrete cup."
Dig 4 to 6 inches deeper than your target post depth (target 24" below grade; dig to 28–30").
Tamp down 4 to 6 inches of 3/4" washed angular gravel.
Rest the post bottom directly on the stone base so water draining down the wood fibers escapes into the sub-base instead of rotting the end grain.
2. Backfill with "Clean" Rocks
If you extracted fist-sized or larger rocks during excavation, wash the mud off and use them as aggregate ballast. Placing dense, clean fieldstone around the post while pouring concrete reduces the concrete required by 20–30% and locks the post against wind drift while the mix cures.
3. Sloping the Collar Above Grade
Leave the concrete level roughly 2 inches below the lawn line, or dome it slightly above the surface with a trowel sloping away from the post:
The Slope Method: Smooth the top of the pour into a slight pyramid or dome. Water runs directly off the concrete collar rather than pooling against the base of the post.
Top off the remaining gap with topsoil or native rock mulch if HOA guidelines require a hidden collar.
Step-by-Step Execution Checklist
Verify Utility Clearances: Call 811 before digging to clear electric, gas, and communications lines along the right-of-way.
Break Hardpan and Rocks: Drive a 16–18 lb pointed steel spud bar around the circumference of the hole to fracture shale, limestone, or granite before using post-hole diggers.
Establish Depth & Setback: Ensure the hole depth allows the post to sit with the mailbox floor 41 to 45 inches above the road surface and the face set back 6 to 8 inches from the curb face.
Pack the Base: Dump 4–6 inches of crushed gravel into the bottom and tamp firm with the blunt end of the spud bar.
Plumb and Brace: Seat the post, attach a two-way post level, and secure it with two diagonal 1x4 stakes clamped to the post.
Pour Concrete: Pour one 50-lb bag of fast-setting concrete dry into the hole, add roughly 1 gallon of clean water (or mix in a wheelbarrow first if the hole is highly irregular), and tamp with a thin rod to eliminate air pockets. Add the second bag to reach 2 inches below grade.
Cure Time: Allow fast-setting mix to firm for 20 to 30 minutes before mounting hardware; allow 24 hours of full cure before subjecting the post to heavy impact or extreme wind loads.
What to Do When a Neighbor Backs Into Your Mailbox
What to Do When a Neighbor Backs Into Your Mailbox
A splintered wooden 4x4, a dented metal box lying in the grass, and tire tracks leading straight across your curb—it’s an awkward suburban rite of passage. Having a neighbor knock down your mailbox is frustrating, but because you share a street, handling it with tact matters just as much as getting the post back upright.
Here is a step-by-step guide to handling the situation smoothly without sparking neighborhood drama.
Document the Scene First
Before clearing any debris or setting the post upright, capture clear evidence:
Take wide and close-up photos: Document the damaged post, any vehicle debris, tire marks, and the distance from the road.
Check security footage: If you have a video doorbell or driveway camera, save the clip showing the incident.
Keep any broken hardware: Save custom numbers, hardware, or brackets in case parts are salvageable.
Have the Conversation Gracefully
Most neighbors will knock on your door immediately or leave a note. If they haven’t, give them the benefit of the doubt—they might not have noticed the bump or may be waiting until regular waking hours.
When you speak, keep it calm and low-stakes. Start with a light, collaborative tone: "Hey, it looks like your bumper caught our mailbox earlier. Just wanted to connect so we can figure out getting it fixed."
Framing the issue as a joint problem to solve rather than an interrogation keeps defensive walls down and keeps your working relationship intact.
Settle the Repairs
Mailbox repairs rarely justify an auto or homeowners insurance claim due to deductibles. Instead, agree on one of two direct solutions:
They replace or repair it themselves: If your neighbor is handy and the damage is straightforward, they may offer to dig the hole, pour quick-set concrete, and install an identical post.
You hire a handyman and send the receipt: If you prefer a professional or have a custom brick or decorative iron structure, get an estimate upfront, agree on the cost in writing (or via text), and let them reimburse you upon completion.
Mind the USPS Regulations
Remember that curbside mailboxes must follow strict United States Postal Service placement guidelines. Ensure the new post puts the bottom of the box 41 to 45 inches above the road surface and set back 6 to 8 inches from the curb. Federal regulations also recommend a 4x4 wooden post or a 2-inch diameter aluminum/steel pipe designed to break away cleanly on impact for road safety.
Did your neighbor leave a note, or are you currently trying to figure out who knocked it down?
WILL INSURANCE COVER MAIlBOX REPLACEMENT?

The answer depends entirely on who was driving and whose insurance is being used. There isn't a specific list of "mailbox-friendly" insurance companies; rather, it is a standard rule of how different types of coverage work across the industry (State Farm, Geico, Allstate, Progressive, etc.).
Here is the breakdown of which insurance covers a mailbox without a deductible:
1. If YOU hit someone else's mailbox
Coverage: Property Damage Liability (Auto)
Deductible: $0 (No Deductible)
Who Covers It: All major auto insurance carriers.
If you back into a neighbor's post or slide into one, your auto insurance's "Property Damage Liability" pays to replace their mailbox.
* The Rule: Liability coverage almost never has a deductible. Your insurance pays 100% of the cost to fix the other person’s property, up to your policy limits.
* The Cost: You pay nothing out of pocket for the repair, though your premiums may increase later due to the at-fault claim.
2. If SOMEONE ELSE hits your mailbox (and you know who)
Coverage: The At-Fault Driver’s Property Damage Liability
Deductible: $0 (No Deductible for you)
Who Covers It: The other driver's insurance company.
If a neighbor or delivery driver hits your post and you get their insurance info, you file a claim against their insurance.
* The Rule: You are the "third party" claimant. You do not pay a penny. Their insurance is legally required to make you whole (pay for a new post and installation).
3. If it was a HIT-AND-RUN (Unknown Driver)
Coverage: Homeowners Insurance or Uninsured Motorist Property Damage (UMPD)
Deductible: Yes, you usually pay a deductible.
This is the most frustrating scenario. Because the driver is gone, you have to use your own policy.
* Homeowners Insurance: Most homeowners policies have a deductible of $1,000 or more. Since a mailbox typically costs $200–$600 to replace, insurance usually covers nothing because the damage is less than the deductible.
* Uninsured Motorist Property Damage (UMPD): In some states, you can claim this on your auto policy.
* Note: This often still has a deductible (commonly $200–$250 for property damage), meaning you might only get a small payout, if anything.
4. If YOU hit your OWN mailbox
Coverage: Collision Coverage (Auto)
Deductible: Yes, you pay your collision deductible.
Liability coverage does not cover your own property. You would have to use your "Collision" coverage.
* The Rule: If you have a $500 deductible and the mailbox costs $400, insurance pays nothing. If the damage to your car is significant, you might file a claim, but you still have to pay the deductible first.
Summary Table
| Scenario | Coverage Type | Deductible? |
|---|---|---|
| You hit a neighbor's mailbox | Your Auto Liability | NO ($0) |
| Neighbor hits your mailbox | Their Auto Liability | NO ($0) |
| Hit-and-run (Unknown driver) | Your Homeowners | YES (Usually $1,000+) |
| You hit your own mailbox | Your Auto Collision | YES (Usually $500+) |
Next Step
If you are the one who hit a mailbox and need to facilitate a repair to avoid an insurance claim (which might raise your rates), would you like a template for a polite note to leave the homeowner offering to fix it directly?
Mailbox installation in Northern virginia
🏡 The Ultimate Guide to a Rock-Solid Mailbox Post Installation: Tips, Tricks, and Best Practices
A mailbox post is more than just a place to hang your box—it's a critical piece of your home's curb appeal and a necessity for receiving mail. A wobbly, leaning, or improperly installed post can be an eyesore and a hassle.
Ready to make your mailbox installation a one-and-done project? Here are the essential tips, tricks, and best practices to ensure your new post stands straight and strong for years to come.
1. 📋 Know the Rules: USPS Regulations are Law
Before you even grab your post hole digger, you must know and follow the official U.S. Postal Service (USPS) guidelines. Ignoring these can result in your mail carrier not delivering your mail.
* Height: The bottom of your mailbox (or the point of mail entry) must be 41 to 45 inches above the road surface.
* Setback: The mailbox door or front face should be positioned 6 to 8 inches back from the curb or edge of the road. If you don't have a raised curb, check with your local postmaster for specific guidance.
* Safety First: The Federal Highway Administration (FHWA) and USPS recommend using yielding supports, such as a 4x4-inch wooden post or a 2-inch diameter steel or aluminum pipe. Avoid unyielding supports like concrete-filled heavy metal pipes or brick pillars, as these pose a danger if struck by a vehicle.
* Clear Labeling: Your house number should be clearly marked on the box, with numbers at least 1 inch high.
2. ⚠️ Pre-Digging Must-Do: Call 811
This is the most critical step you can take for safety. Digging without knowing what's underneath can lead to costly and dangerous utility line damage.
* Tip: Call 811 (the national "Call Before You Dig" hotline) a few days before you plan to start your project. They will coordinate with local utility companies to have underground lines (gas, water, electric, cable) marked with flags or paint, usually for free.
3. 🛠️ Installation Best Practices
A solid installation requires the right technique, regardless of the material you choose.
The Hole: Depth and Drainage
* Depth: Dig a hole that allows your post to be buried 18 to 24 inches deep. Burying it too deep can violate safety rules, while too shallow leads to wobbling.
* Drainage is Key: Pour about 4 to 6 inches of gravel into the bottom of the hole before setting the post. This promotes drainage, prevents water from pooling around the post's base, and significantly delays rot for wooden posts or rust for metal posts.
Concrete vs. No-Concrete
* The Concrete Method (Maximum Stability): This is the most durable method.
* Set the post, check that it's level on all sides, and then pour fast-setting concrete mix into the hole.
* Pro Tip: Slope the top of the concrete slightly away from the post's center. This ensures rainwater runs off and doesn't sit against the wood or metal, which is where rot/rust starts.
* Patience: Brace your post to keep it perfectly straight and allow the concrete to cure fully (often 24–48 hours) before attaching the mailbox.
* The Backfill Method (Yielding and Repairable): This is a popular option that adheres strictly to the yielding support recommendation.
* Set the post, level it, and then fill the hole with a mix of gravel and native soil, tamping down every few inches.
* Trick: The Soak-and-Set: After filling and tamping, soak the base with water. This helps the soil settle and naturally harden around the post, creating a firm base without the rigidity of pure concrete.
The Leveling Trick
* Use a post level (a small, L-shaped or box-shaped level that wraps around the post) to check for plumb on all sides as you fill the hole.
* Bracing: Use temporary wooden stakes and scrap lumber to brace the post at 90-degree angles. This will keep it perfectly straight while the concrete sets or the soil is tamped.
4. ✨ The Final Touches & Longevity Tips
* Mounting Plate: If your mailbox is going onto a 4x4 wooden post, use a small piece of treated wood or a designated mounting plate to create a flat, secure surface for the box. This prevents the mailbox from warping or cracking.
* Hardware: Use exterior-grade screws or lag bolts (like galvanized or stainless steel) that won't rust and create streaks down your post.
* Maintenance: Once a year, give your post a quick check-up.
* Tighten any loose screws.
* Repaint or re-stain wood posts to keep them protected from the elements.
* Clear away any landscaping (vines, bushes, tall grass) that might obstruct access for your mail carrier.
By following these best practices, your mailbox post will be an attractive, compliant, and durable addition to your property!
Would you like to search for the best exterior-grade screws for mailbox post installation, or perhaps look into decorative options for your new post?
From Steel to Copper: Understanding Mailbox Materials
Your mailbox is more than just a box on a post; it's the first impression of your home, a sentry against the elements, and the secure receiver of your important mail. But have you ever considered what it’s actually made of? The material of your mailbox dictates its durability, required maintenance, and overall aesthetic appeal.
Choosing the right material is key to ensuring your mailbox stands the test of time and enhances your home's curb appeal. Let's break down the most popular choices, from rugged steel to elegant copper.
🛡️ 1. Galvanized Steel and Aluminum: The Reliable Workhorses
These are the most common materials for residential mailboxes, offering a balance of performance and affordability
👉 Key Takeaway: If you prioritize durability against impact (e.g., in a high-traffic area) and cost-effectiveness, galvanized steel is your best bet. If you live near the ocean or prefer a lighter option, aluminum is superior due to its rust immunity.
🧱 2. Plastic and Vinyl: The Low-Maintenance Choice
Modern plastics and vinyl are engineered to withstand weather extremes without the upkeep of metals.
• Durability: Highly resistant to moisture, corrosion, and fading thanks to UV inhibitors. They will never rust. However, they can become brittle in extreme cold or crack under a heavy impact.
• Maintenance: Extremely low. A simple wash with soap and water is all that's usually needed. They never need painting.
• Aesthetics: Often molded to mimic classic metal designs or used for sleek, contemporary looks. They are available in a huge range of colors.
👉 Key Takeaway: Perfect for homeowners who want zero-fuss maintenance and a mailbox that won't show signs of rust or extensive weathering.
✨ 3. Solid Brass and Copper: The Timeless, High-End Statement
These materials move beyond function and into the realm of home décor and architectural accents. They are a significant investment that pays off in unique beauty.
• Durability: Both are incredibly durable and naturally resistant to rust. They are built to last for decades.
• Maintenance & Aesthetics: This is where the magic happens.
• Copper: Over time, it develops a beautiful blue-green protective layer called a patina. Many homeowners love this natural, aged look. If you prefer the bright, original copper finish, it will require periodic polishing.
• Brass: It will also age, darkening slightly or taking on a greenish tint depending on the alloy and environment. It holds up well but often requires a protective lacquer to maintain its shine, which must be reapplied over time.
👉 Key Takeaway: Choose brass or copper if you are looking for maximum curb appeal and a material that gets more beautiful and distinctive with age. It's the ultimate upgrade for a historical or luxury home.
🤔 The Final Decision: Which Material is Right for You?
When standing at the hardware store or browsing online, ask yourself these three questions:
1. What is my climate? (Coastal salt spray? Heavy snow? Intense sun? This impacts the need for rust or UV resistance.)
2. How much maintenance am I willing to do? (Do you mind polishing and touch-up painting, or do you want to set it and forget it?)
3. What is my home's style? (Do you need a classic look that blends in, or a statement piece that stands out?)
By weighing durability, maintenance, and your desired aesthetic, you can select a mailbox material that will deliver your mail reliably and beautifully for years to come.
Mailbox Makeover: Accessories You Never Knew You Needed!
Tired of your mailbox being just a drab box at the end of your driveway? It’s time to think beyond just checking the mail! Your mailbox is one of the first things people see when approaching your home, and with the right accessories, it can become a statement piece that boosts your curb appeal.
Forget the plain metal or plastic—here are some amazing mailbox accessories you might not have known existed, but definitely need!
1. The Power of the Post: Upgrading Your Foundation
Your mailbox post is the foundation, and a simple upgrade here can make all the difference.
• Decorative Mailbox Posts: Move past the standard 4x4. Options range from classic, elegant cedar to durable, modern cast aluminum. Look for posts with decorative scrolls, fluted columns, or integrated planters.
• Mailbox Brackets: These are the supports connecting the mailbox to the post. Instead of a simple straight piece, choose a bracket with a stylized shape—like an arch or a scroll—to add an instant touch of elegance.
• Post Cuffs or Wraps: If you can't replace the entire post, a post cuff is a quick facelift. These decorative moldings slip over the base of your existing post, concealing unsightly ground lines and adding a polished, finished look.
2. The Finishing Touch: Decorative Finials
A finial is a small, decorative ornament typically placed at the top of an architectural feature. Adding one to your mailbox post is the equivalent of putting a bow on a beautifully wrapped present.
• Variety is Key: Finials come in countless shapes and materials. You can find classic acorn shapes, elegant eagles, stately pineapples (a symbol of hospitality), or simple, clean ball designs.
• Easy Installation: Most finials are designed to be easily screwed or attached to the top of the post, instantly giving your setup a sophisticated, custom-built look.
3. Convenience King: Newspaper & Package Holders
Stop leaving your newspaper on the wet ground! These accessories combine function with style.
• Newspaper Holders/Tubes: These are metal or plastic tubes mounted under the mailbox, keeping your paper dry, off the ground, and neatly rolled up. They are a practical addition, especially in rainy or snowy climates.
• Integrated Package Shelves: For homes that receive small-to-medium-sized packages frequently, some modern posts or post systems come with a discreet shelf or compartment underneath the main box. This keeps packages off the porch and slightly more hidden until you retrieve them.
4. Beyond the Box: Address Plaques & Decals
Make sure your delivery driver—and your guests—can easily find your house, day or night!
• Custom Address Plaques: Instead of tiny numbers on the box itself, mount a large, beautiful plaque on the side of the post. Choose a contrasting color (like gold numbers on a black background) for maximum visibility.
• Reflective or Solar Numbers: For safety and convenience, especially at night, consider highly reflective vinyl numbers or even a small solar-powered light that illuminates the address plaque.
Ready for Your Mailbox Glow-Up?
Whether you choose a grand aluminum post, an inviting pineapple finial, or a simple newspaper tube, upgrading your mailbox accessories is a simple, affordable way to make a significant impact on your home's curb appeal.
It’s time to give your mailbox the attention it deserves!
Ashburn Farms Mailbox Replacement
Replacing a mailbox in the Ashburn Farms community requires following specific guidelines set by the Ashburn Farm Association. We adhere to the association's specific mailbox guidelines. We do have the diagrams, schematics and the specifically approved colors.
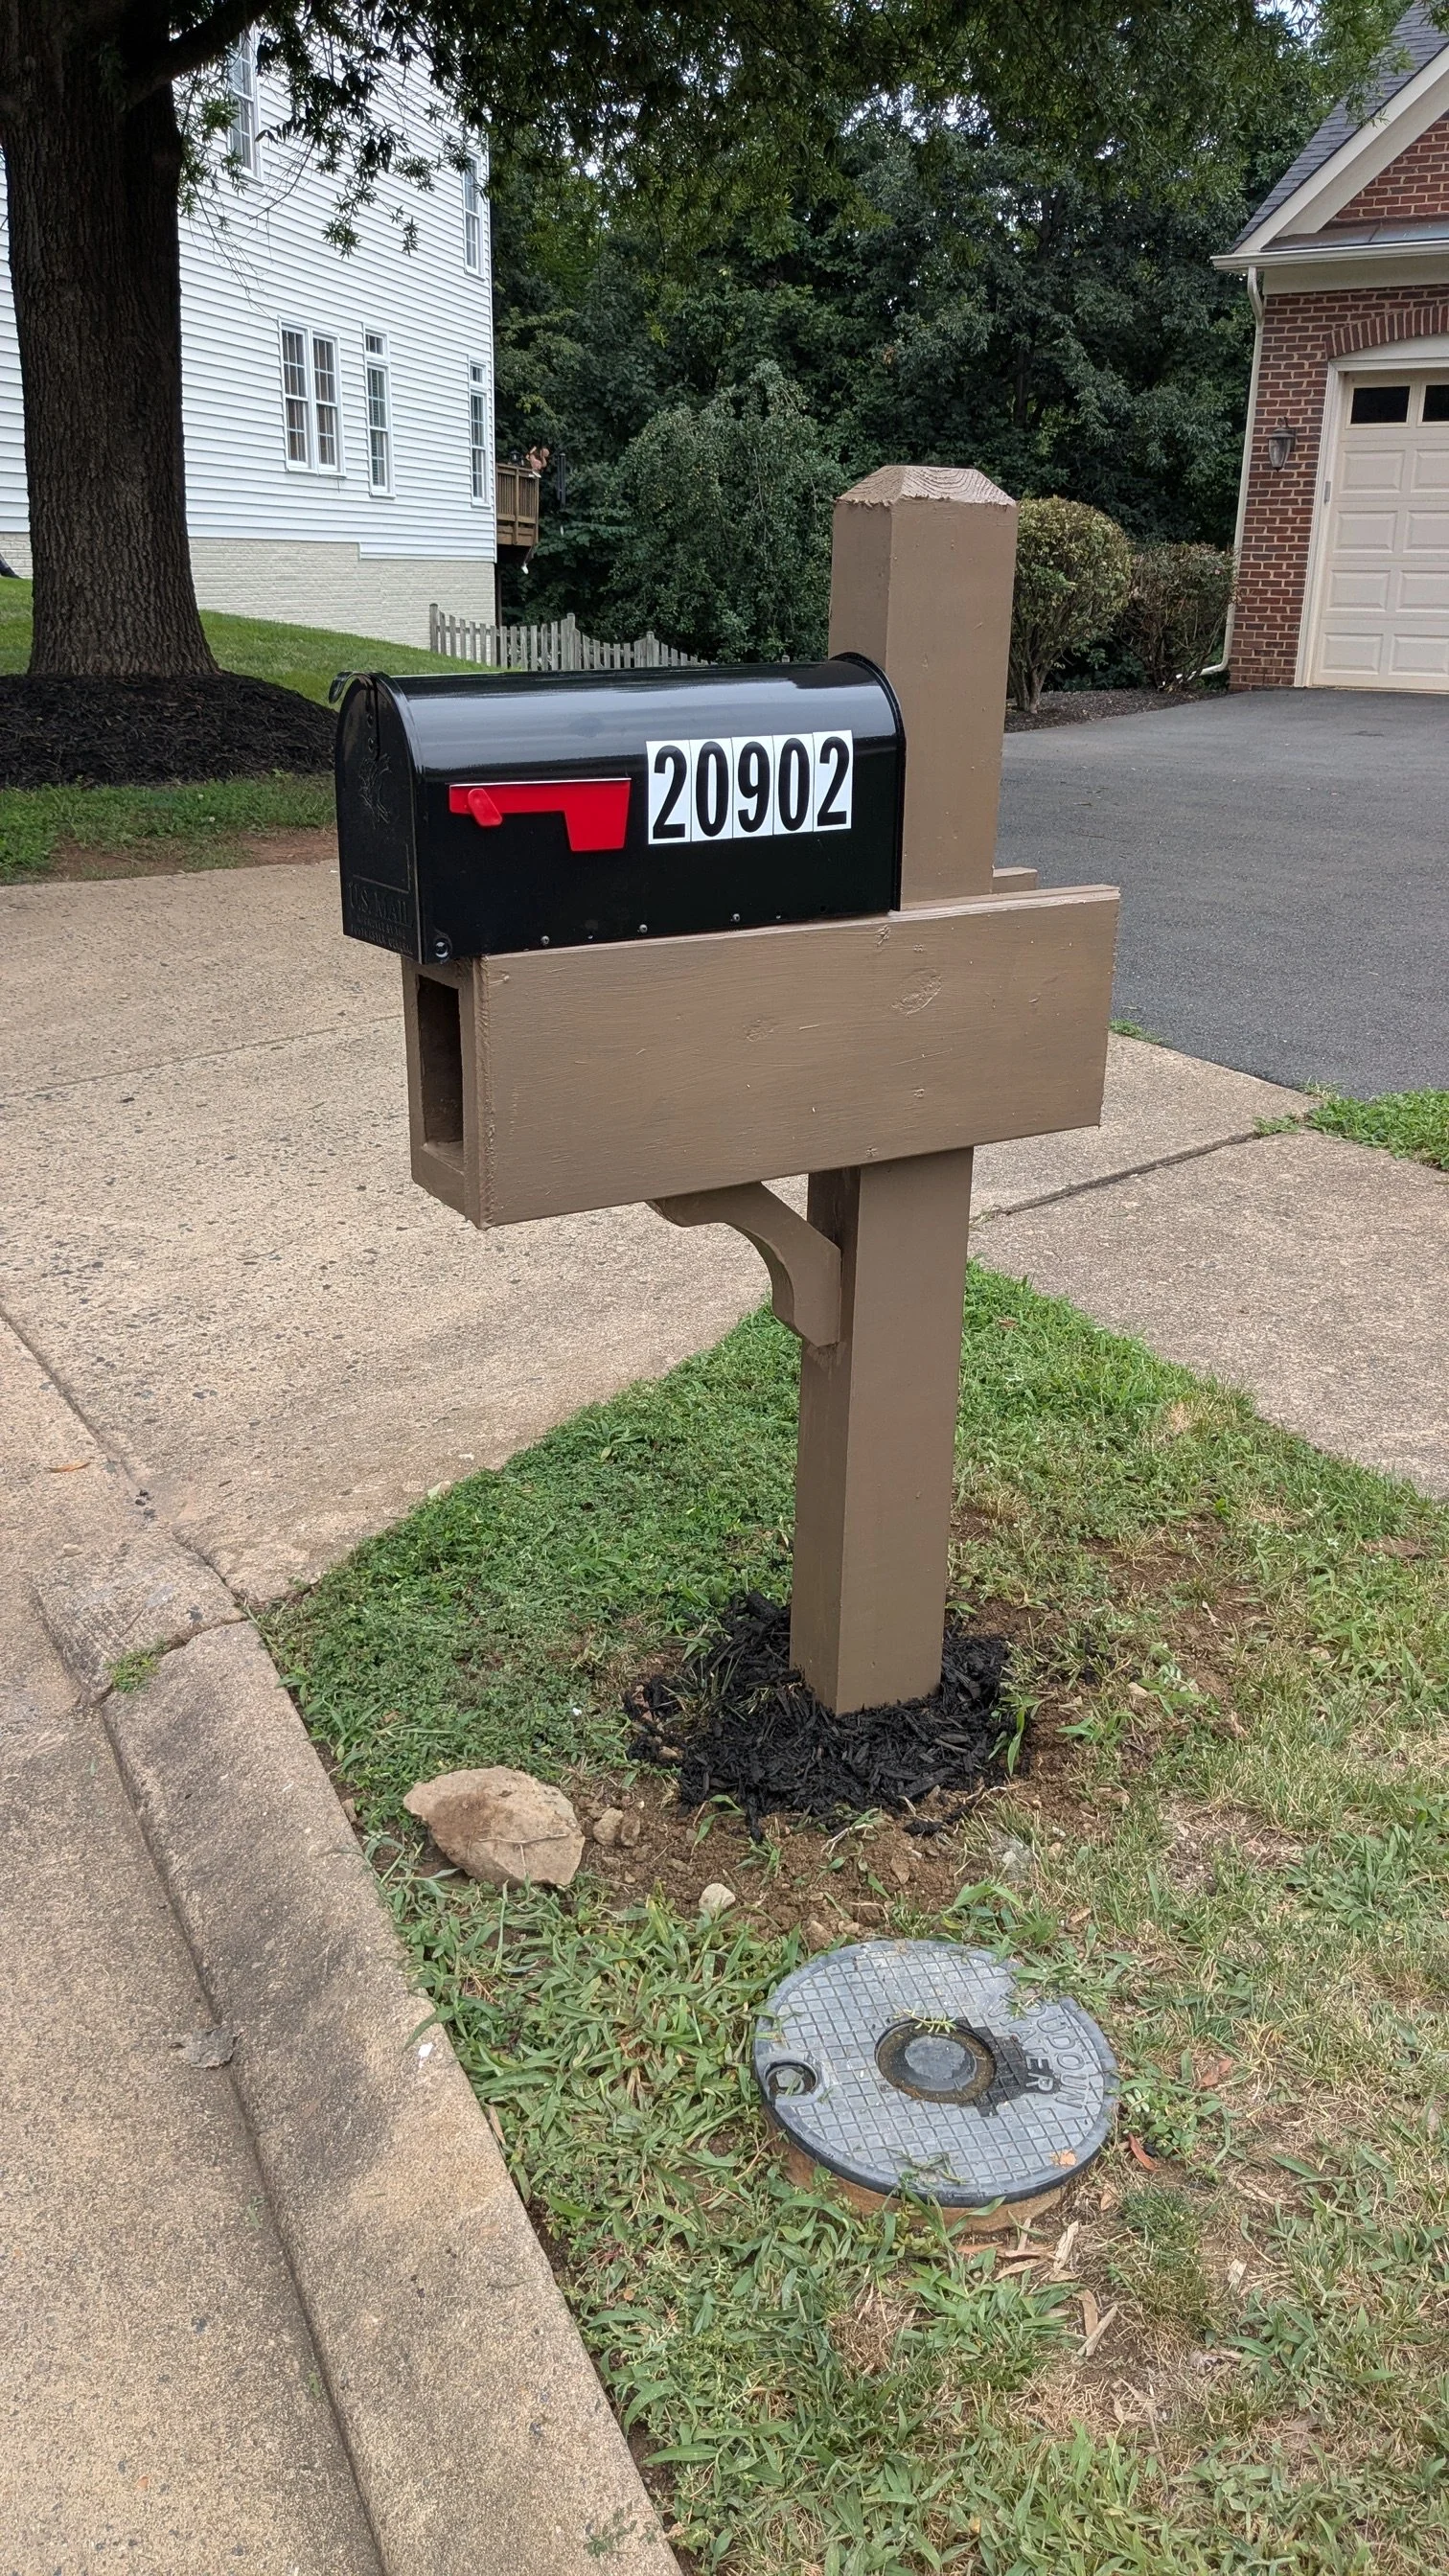
Over the years we have worked with the association. Mailbox replacement, repair and installation.
Our first course of action was to contact Ashburn Farm Association directly to obtain their specific policies and approved designs for mailbox replacements.
So you can be assured that you are in compliance with the community's architectural standards. You searched mailbox repair me becusse you wanted your mailbox post fixed or replaced.
In some other nearby homeowners associations, like Highland Village, the HOA determines the new mailbox design and requires all homeowners to use a specific contractor for replacement to ensure consistency.
No that you know who installs mailboxes near you in Ashburn Farms you have a little more information to use in your decision making process.
You are not required to use a specific contractor, several local companies in the Northern Virginia area specialize in mailbox and post replacement and are familiar with the community’s requirements.
PVC vs Wood Mailbox Posts
Choosing between a PVC (polyvinyl chloride) and a wooden mailbox post involves weighing several factors, including durability, maintenance, aesthetics, and cost. While a wooden post offers a classic, natural look, a PVC post often has advantages in terms of long-term durability and low maintenance.
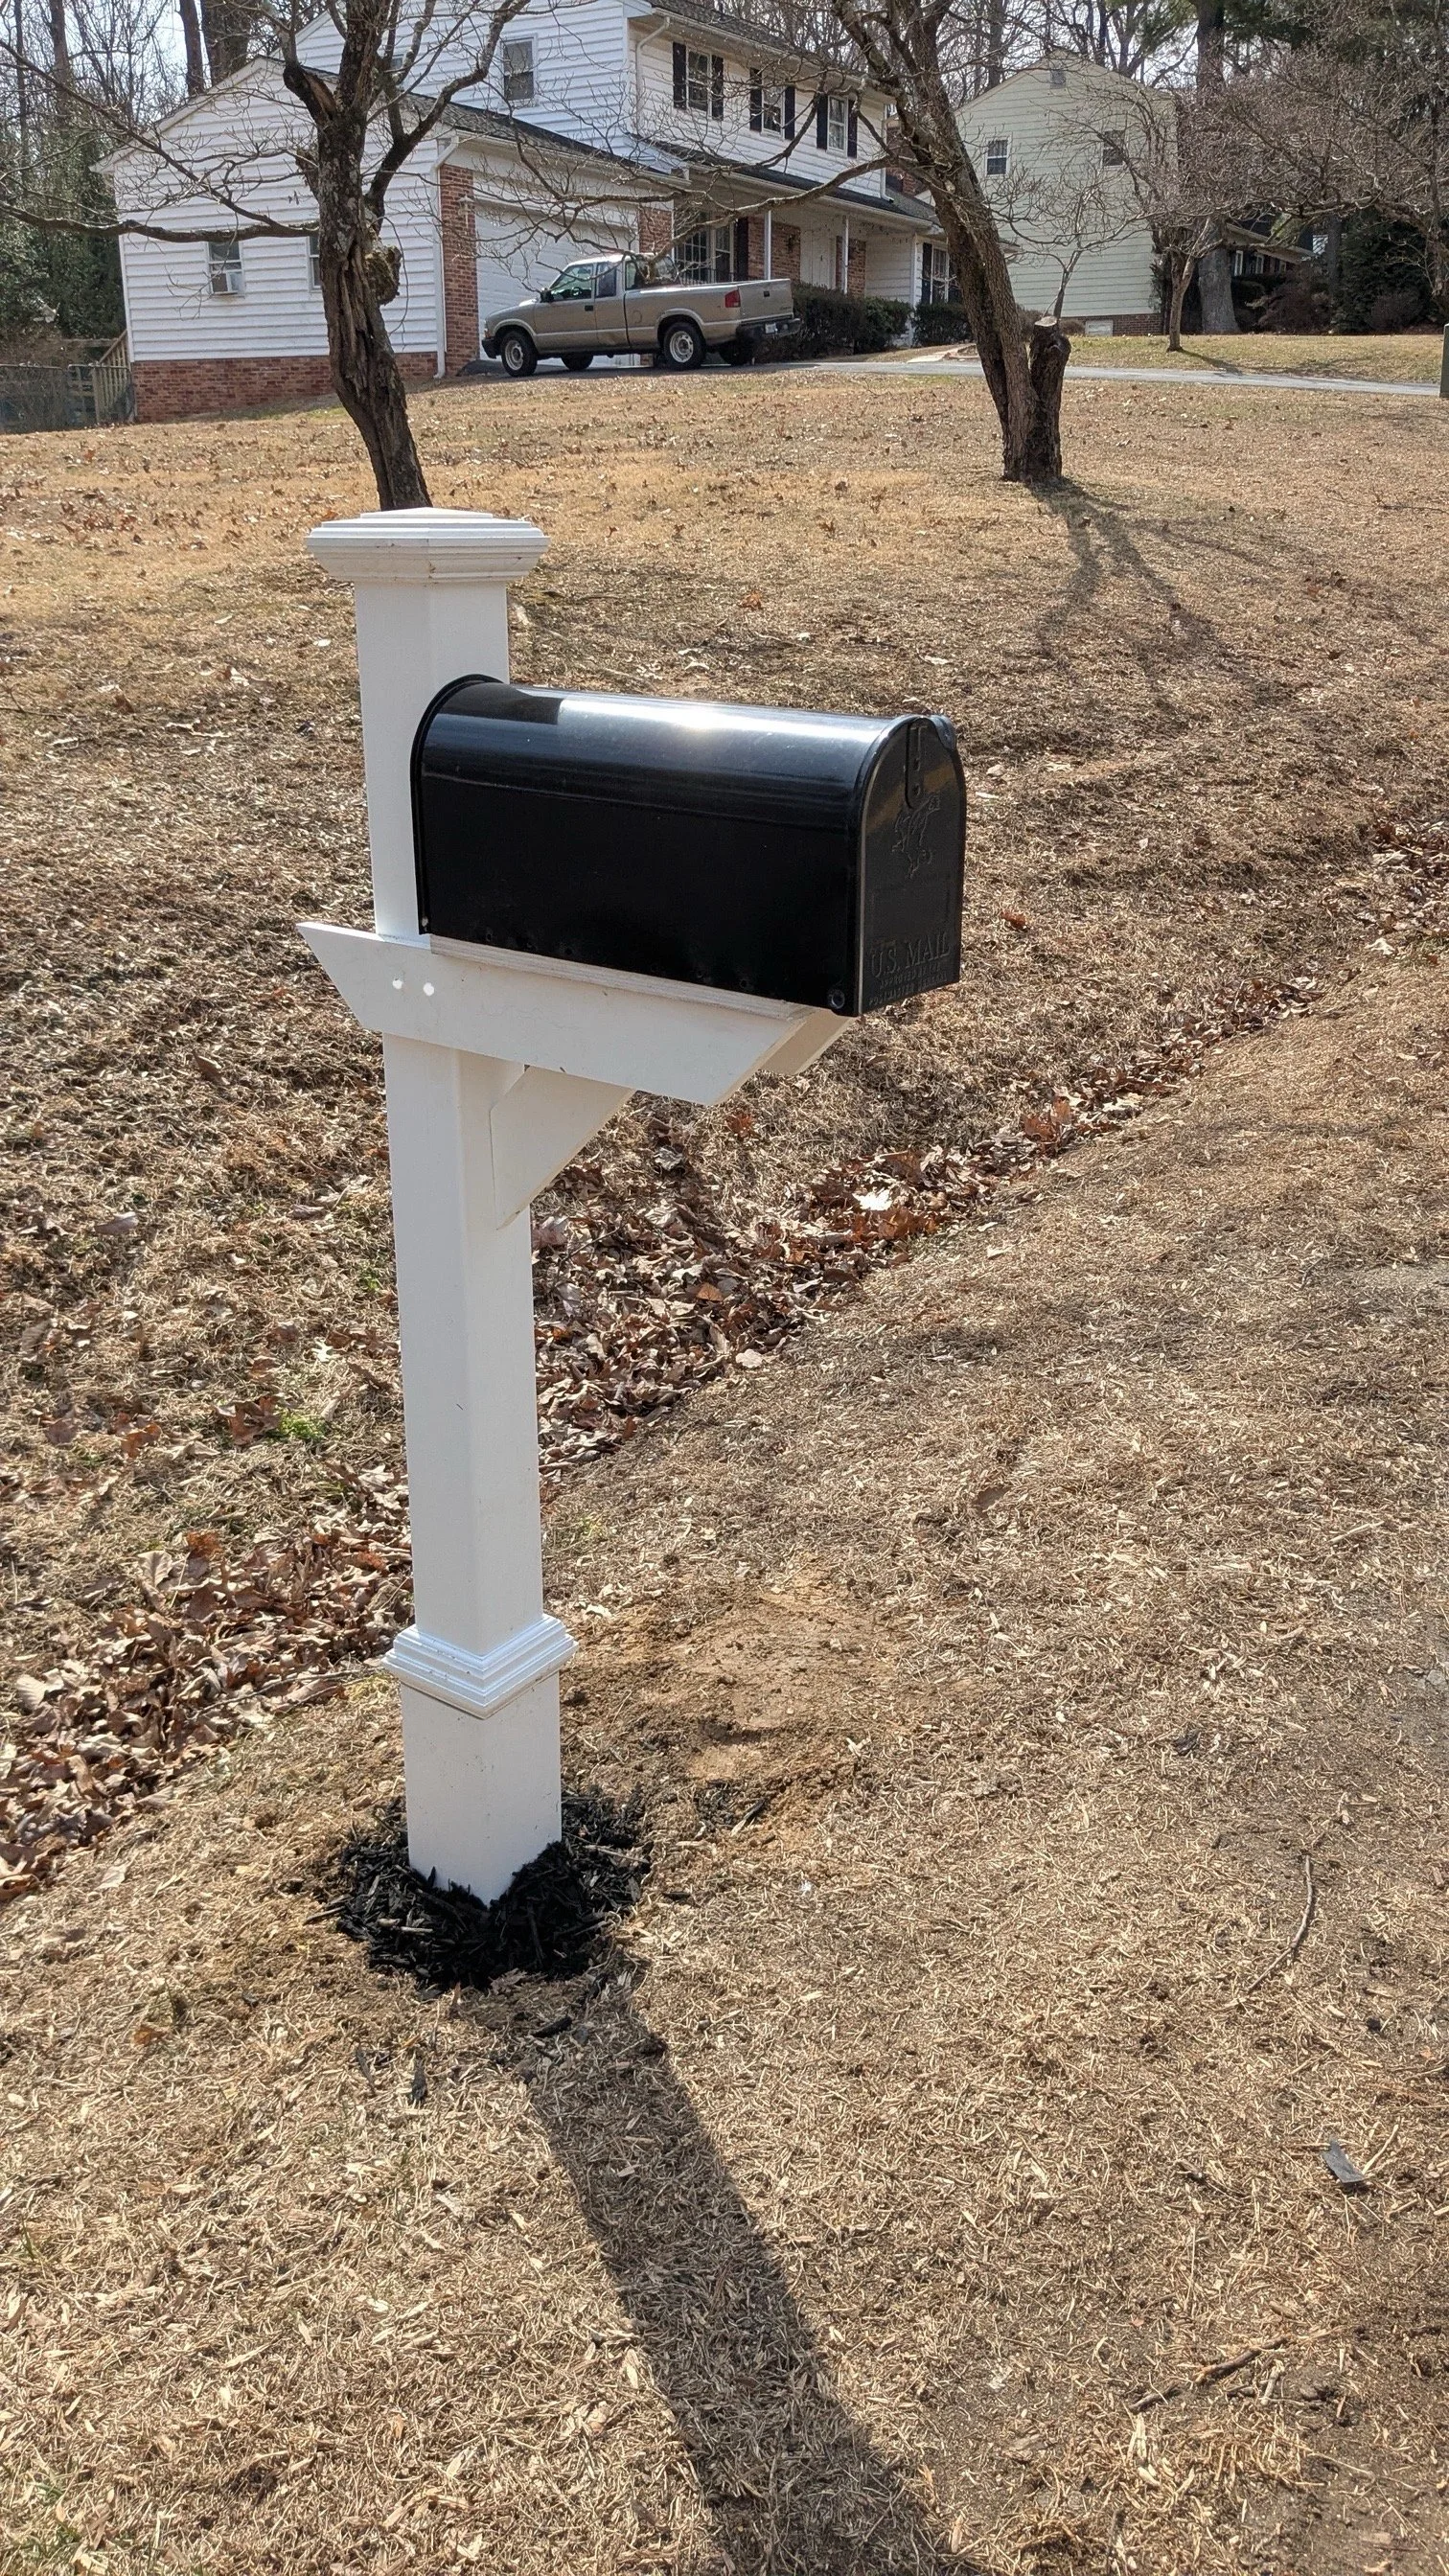
Here's a breakdown of the pros and cons of each:
### PVC Mailbox Posts in Woodbridge Virginia.
**Pros:**
* **Low Maintenance:** This is the biggest selling point for PVC. It won't rot, rust, or warp, and it doesn't need to be painted or stained. Cleaning is typically as simple as wiping it down with soap and water.
* **Durability:** PVC is weather-resistant and can stand up to a variety of environmental conditions without degrading. It's also resistant to insect and termite damage.
* **Consistent Appearance:** A PVC post will maintain its look over time, as it won't splinter or crack. They come in a variety of styles and colors to match your home's aesthetic.
* **Lighter Weight:** This can make installation easier compared to a heavy wooden post.
**Cons:**
* **Potential for Brittleness:** Over time, exposure to sunlight and extreme temperatures can make some PVC products brittle, potentially causing them to snap if hit.
* **Less Sturdy:** While durable, a hollow PVC post may not be as strong as a solid wood post, especially when it comes to resisting impacts from things like snowplows. Many homeowners choose to reinforce PVC posts with a treated 4x4 wooden post inside for added stability.
* **Aesthetics:** Some people prefer the natural, traditional look of wood. While PVC can mimic wood, it may lack the warmth and unique grain patterns of real wood.
* **Can be more expensive:** While this isn't always the case, some high-quality PVC posts can have a higher initial cost than a basic wood post.
### Wooden Mailbox Posts
**Pros:**
* **Classic Aesthetic:** Wood offers a timeless, natural look that can complement a variety of architectural styles. It can also be easily painted or stained to match your home.
* **Sturdiness:** A solid wooden post, especially a pressure-treated one, is generally very strong and can withstand more force than a hollow PVC post.
* **Customization:** Wood is easy to cut, shape, and customize, allowing you to create a unique post design.
* **Affordability:** In some cases, a basic wooden post may be a more affordable option upfront.
**Cons:**
* **High Maintenance:** Wood is susceptible to rot, warping, cracking, and insect damage. It requires regular painting, staining, or sealing to protect it from the elements.
* **Degradation:** Even with proper maintenance, a wooden post will eventually degrade, especially at the ground level where it's exposed to moisture.
* **Less Resistant to Pests:** Wooden posts can be a target for termites and other wood-boring insects, which can compromise their structural integrity.
### Summary
In general, a **PVC mailbox post is a better choice if your top priorities are low maintenance and long-term durability.** It will likely save you time and money on upkeep in the long run.
A **wooden mailbox post is a good choice if you prefer a classic, natural aesthetic and are willing to put in the effort for regular maintenance** to keep it looking good and structurally sound. For the best of both worlds, some people install a wooden post inside a PVC sleeve to get the classic look of PVC with the added strength of a wood core.
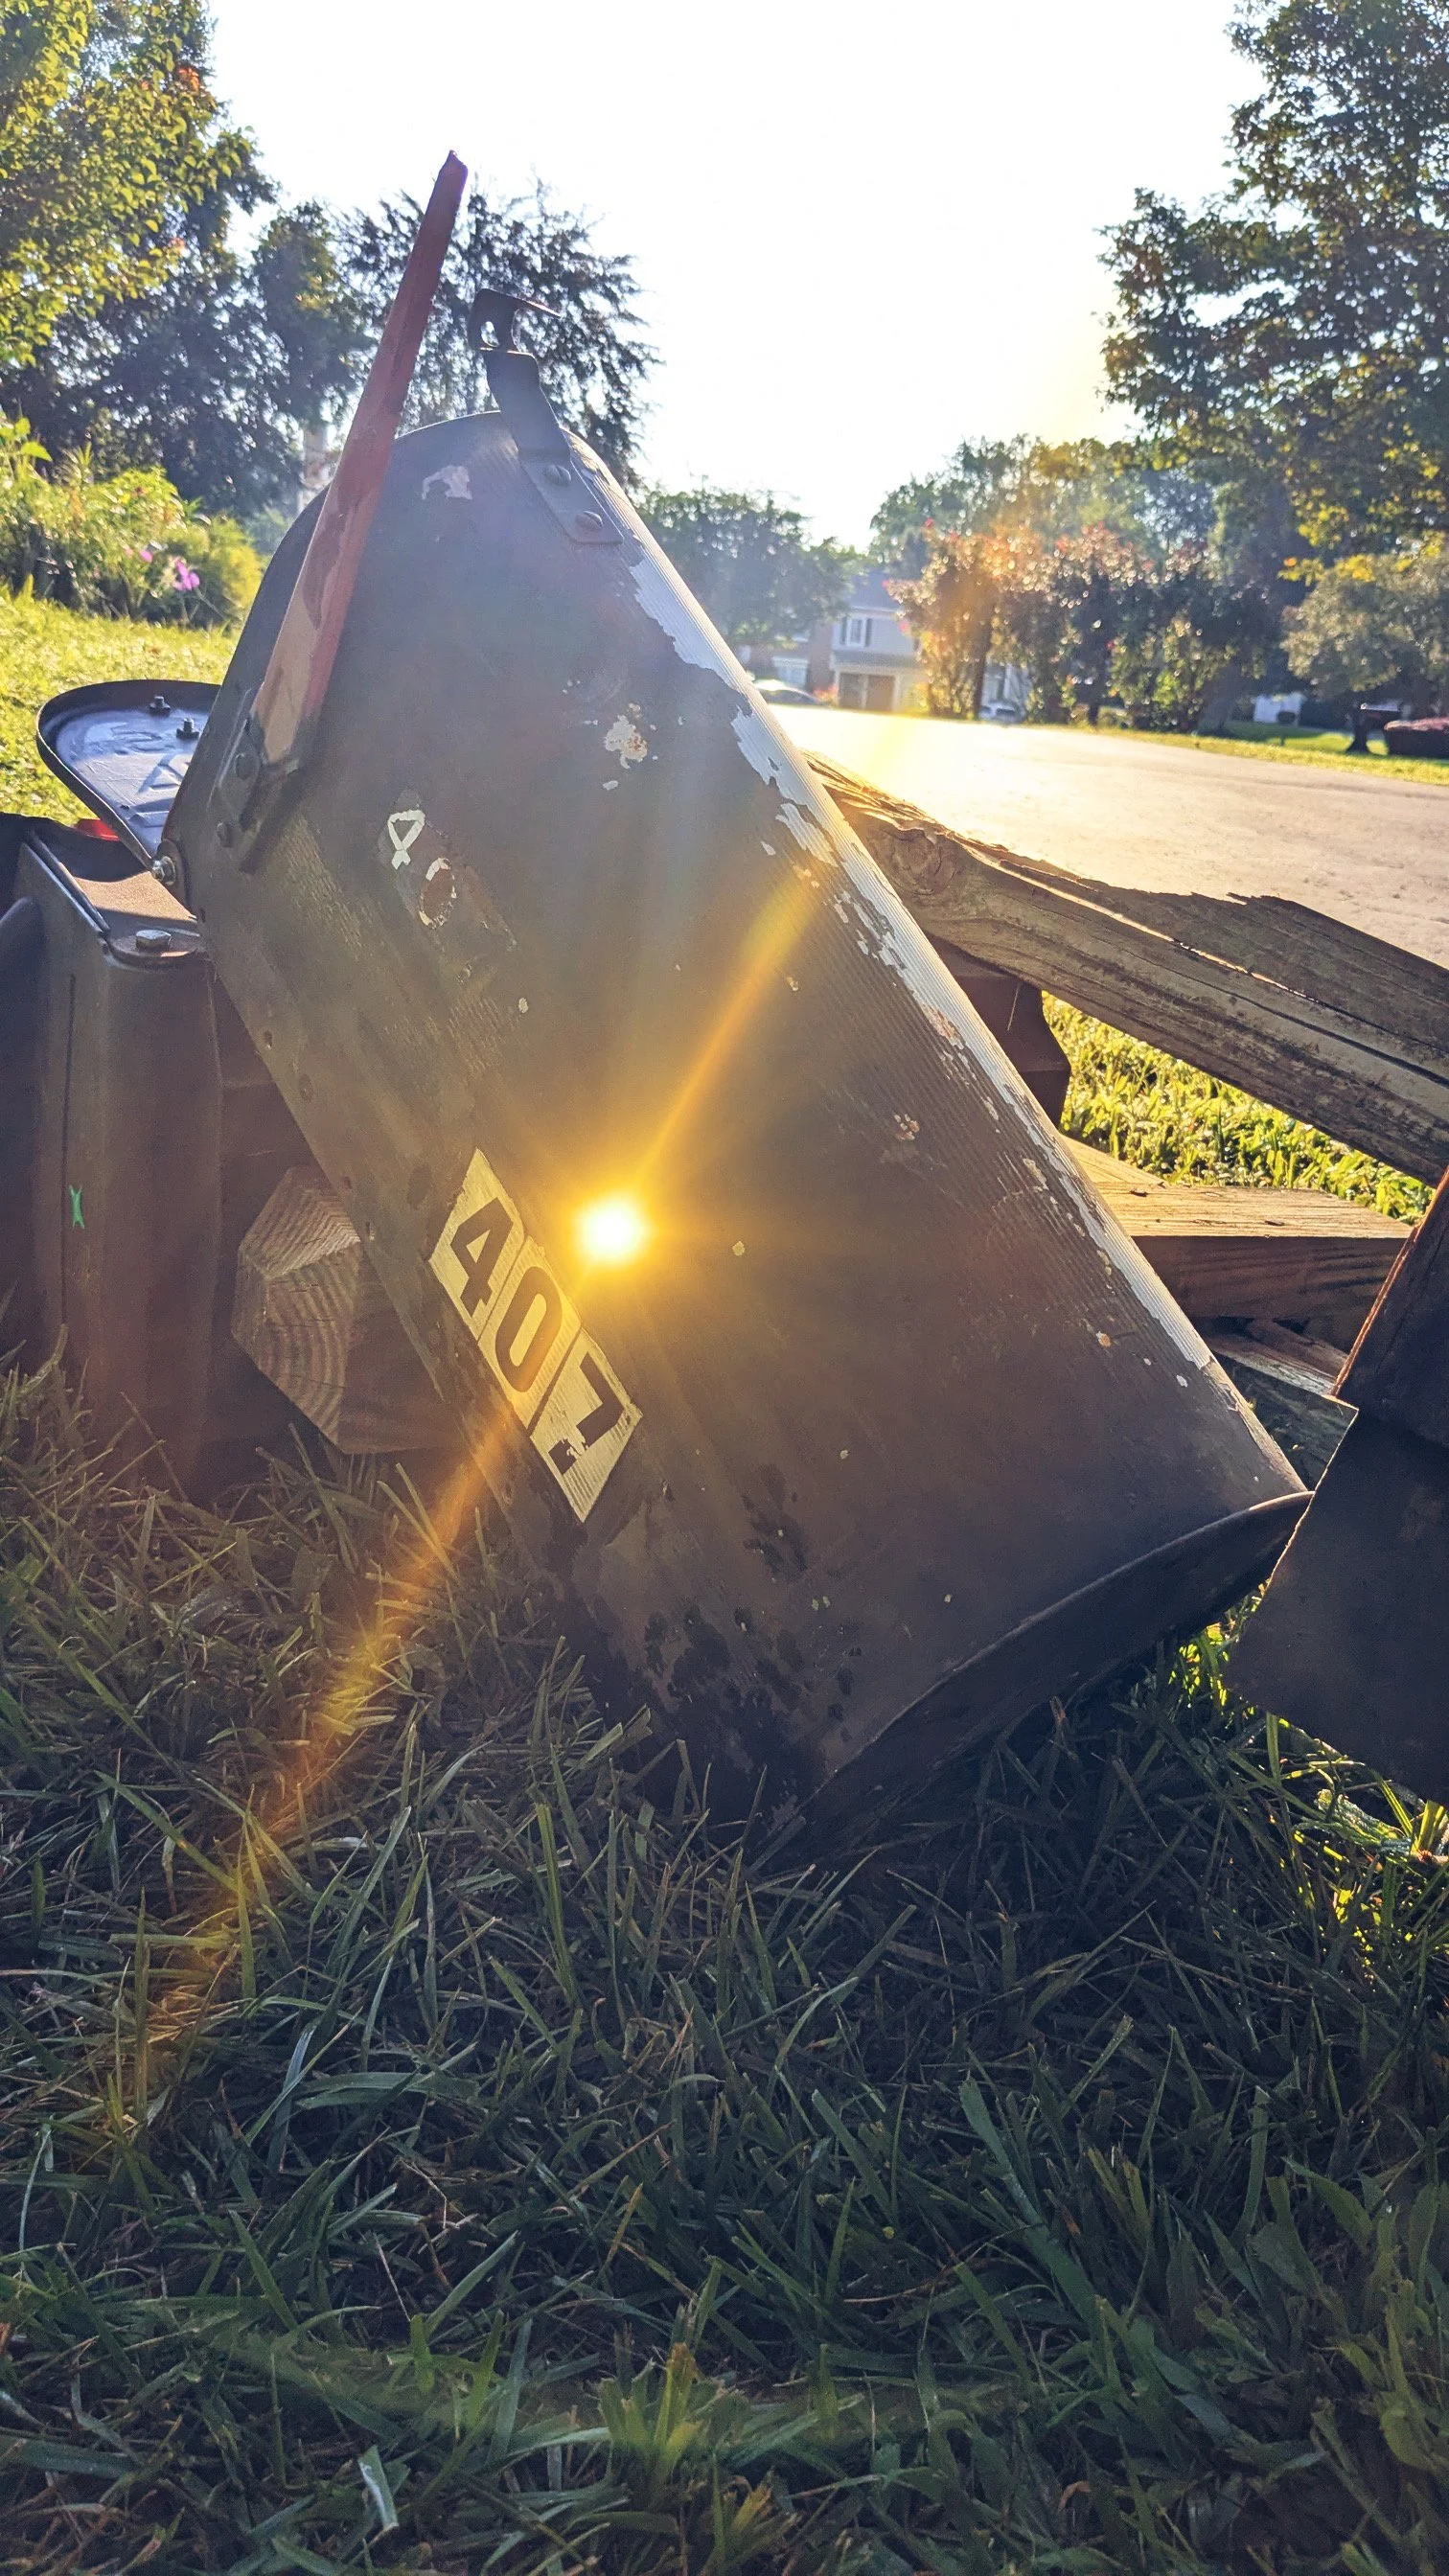
When Should I Replace My Mailbox Post?
Knowing when to replace a mailbox post is important for both safety and aesthetics. When it comes to mailbox replacement in Fairfax Virginia Here are the key signs to look for:
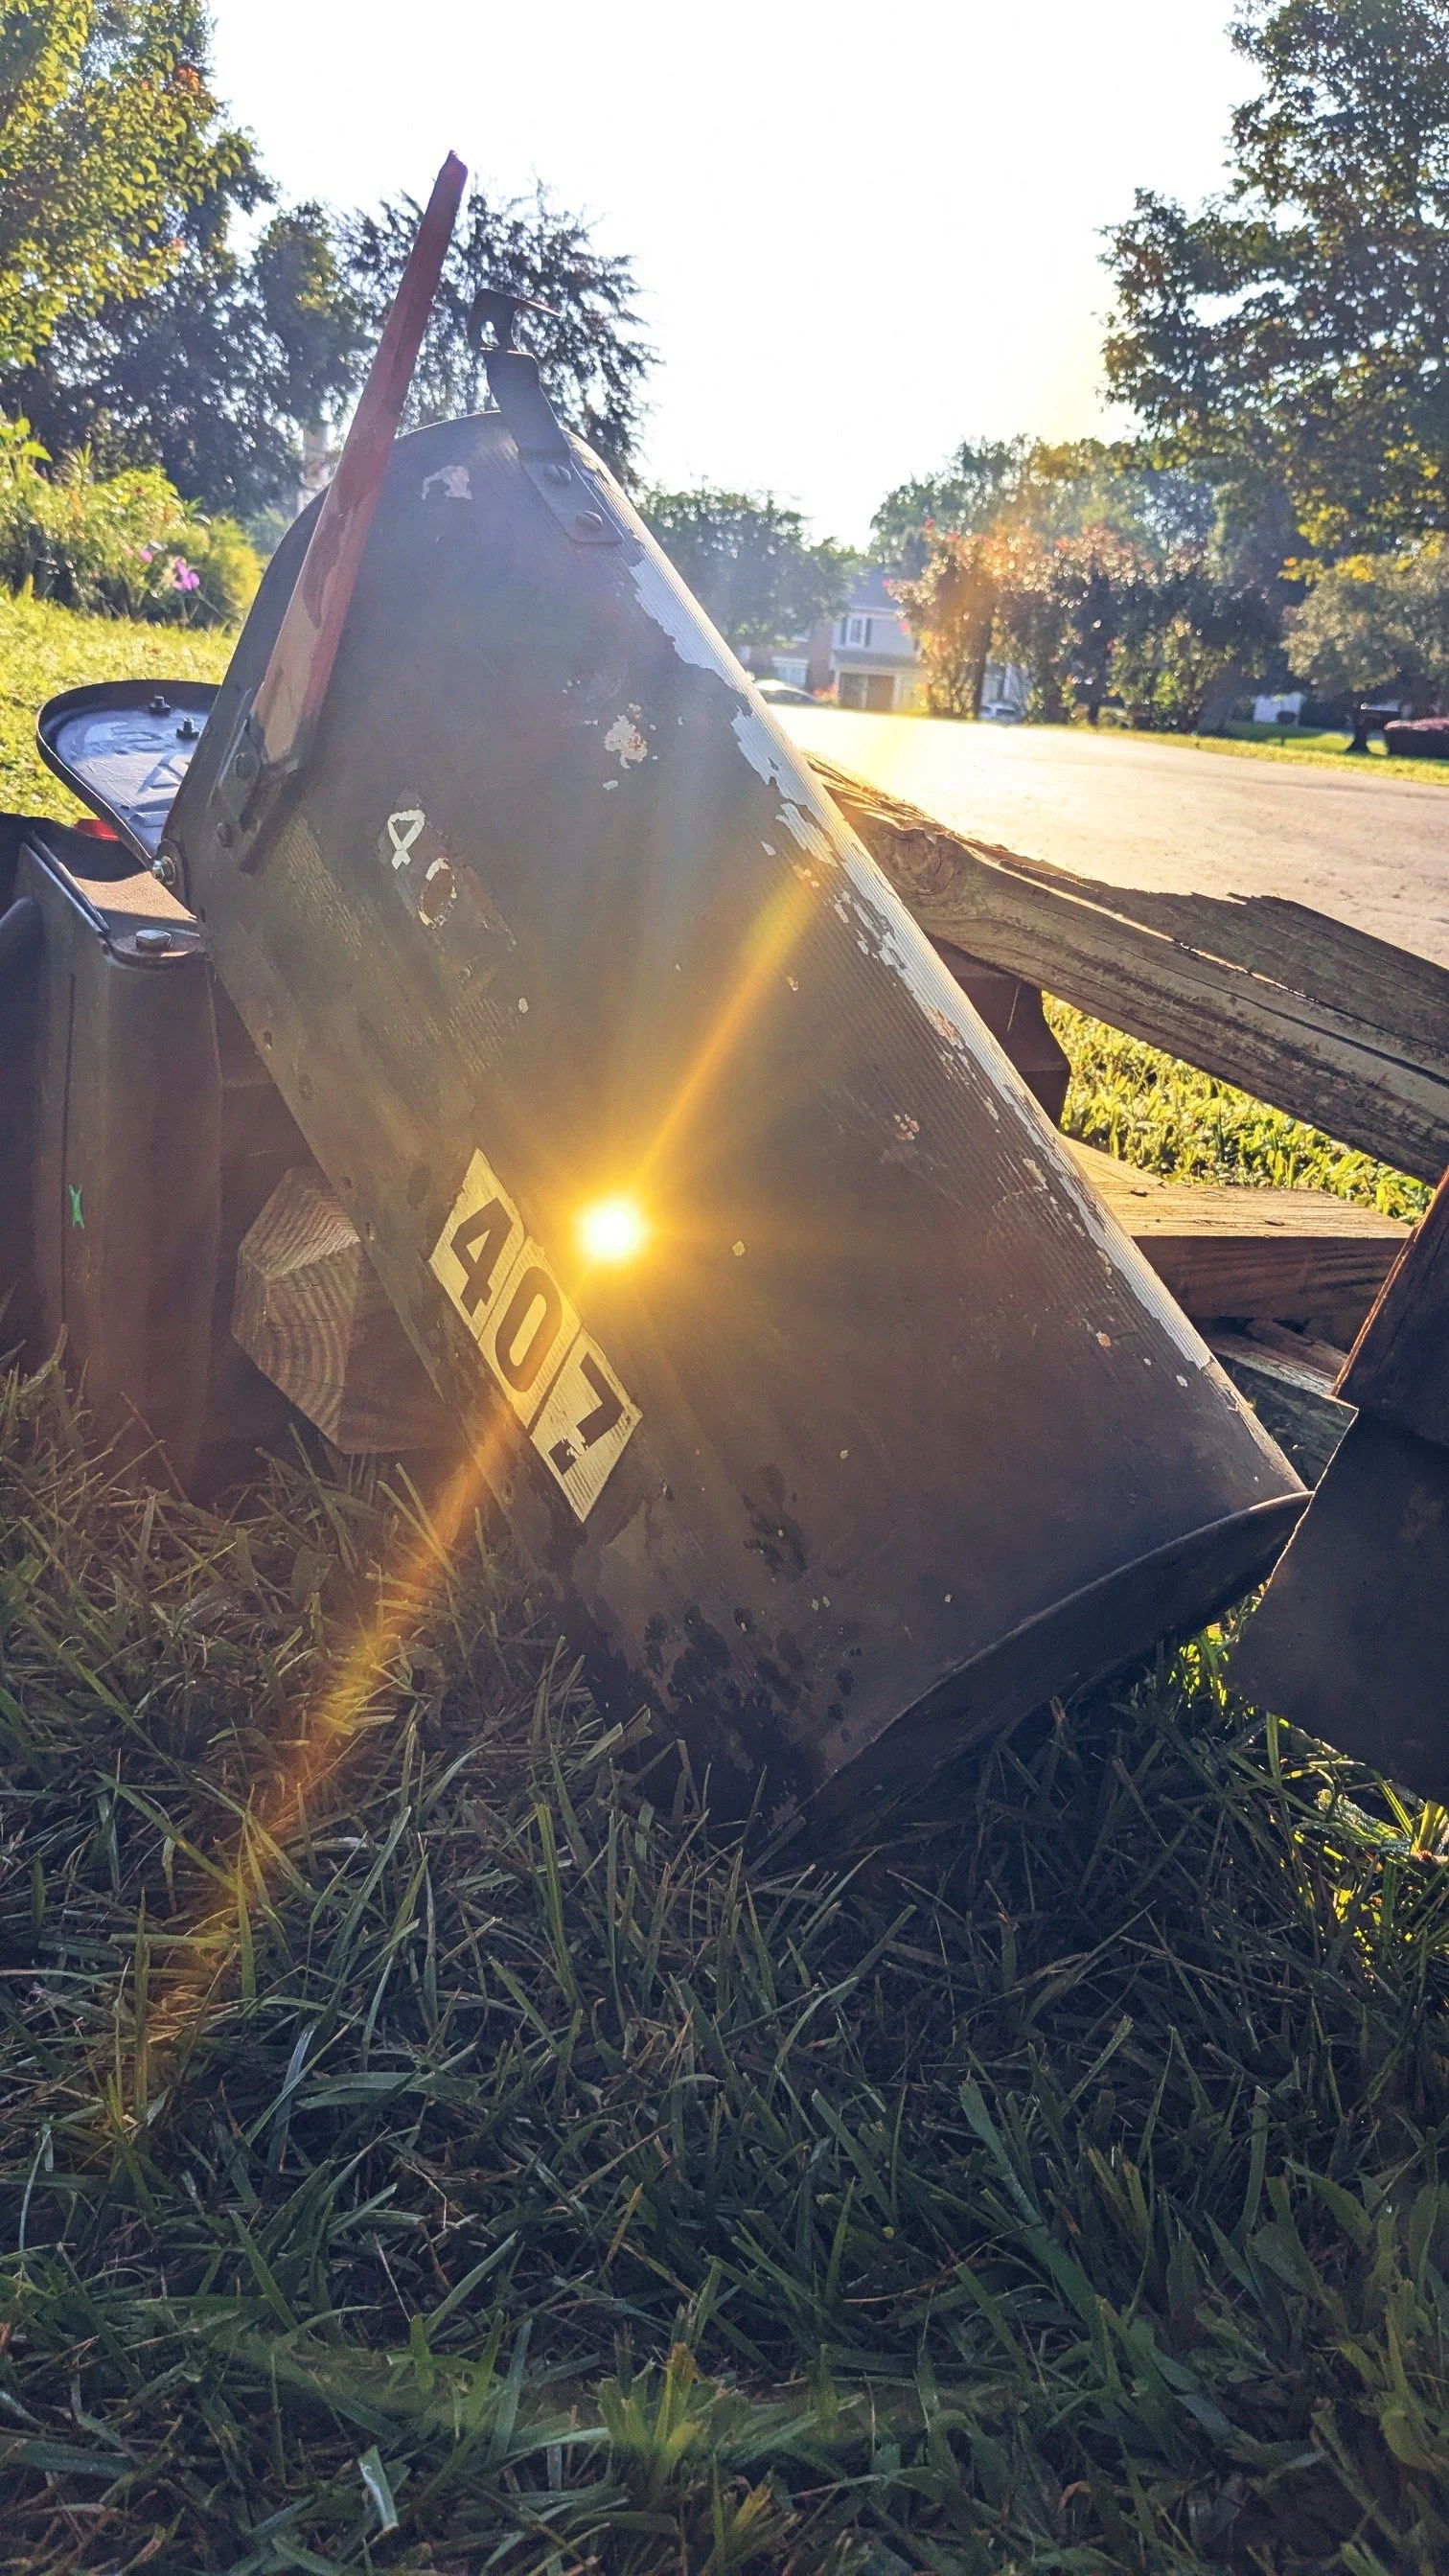
Structural Integrity and Safety
Rot or Deterioration: For a wooden post, check for signs of rot, especially at ground level.1 You might see soft spots, splintering, or a general lack of solidity.
Rust or Corrosion: Metal posts can rust, which can weaken the structure and make it a roadside hazard.2 Check for flaky rust or holes in the metal.
Wobbling or Leaning: If the post is wobbly, leaning, or otherwise unstable, it's a clear sign that it's no longer secure. This can be caused by rotted wood, a rusted base, or a damaged foundation.
Damage from an Accident: If the post has been hit by a car, snowplow, or other object, it should be replaced, even if it appears to be standing. It may have internal damage that compromises its stability.
Roadside Hazard: The U.S. Postal Service recommends that mailbox posts be stable but also designed to bend or fall away if a car hits them.3 Heavy, unyielding posts (like those made of solid concrete or heavy metal pipes) can be a safety hazard and may need to be replaced with a more breakaway-friendly design.4
Functional and Aesthetic Issues
Mailbox is Damaged: While not directly a post issue, a heavily damaged mailbox might signal that the entire structure, including the post, has been compromised. If the mailbox itself is broken, rusted, or has a door that won't close, it's often a good time to consider a full replacement.
Poor Curb Appeal: If your post is an eyesore due to peeling paint, cracks, or a dated design, replacing it can significantly improve your home's curb appeal.
Insect Infestation: For wooden posts, an insect or termite infestation can weaken the post from the inside out, making it a safety risk.5
Before you replace your post, remember to:
Check USPS Guidelines: Ensure your new post and mailbox will meet the United States Postal Service's requirements for height (41–45 inches from the road to the bottom of the box) and placement (6–8 inches back from the curb).6
Call 811: Before you dig, call 811 to have your utility lines marked. This prevents you from accidentally hitting underground gas, water, or electrical lines.

Navigating HOA Mailbox Restrictions:
HOA COMPLIANT MAILBOX POSTS IN APPROVED COLORS
A Guide to Getting Your Dream Mailbox
Many homeowners dream of a stylish and functional mailbox that complements their home's aesthetic. However, homeowner associations (HOAs) often have strict guidelines regarding mailbox design and placement.
This article will provide valuable insights on how to work with your HOA to achieve your desired mailbox while adhering to their regulations.
Understanding HOA Mailbox Regulations
Before embarking on your mailbox quest, it's crucial to familiarize yourself with your HOA's covenants, conditions, and restrictions (CC&Rs). These documents outline specific rules regarding mailbox size, color, material, and placement. Some common restrictions include:
Mailbox size: HOAs often limit the height and width of mailboxes to maintain uniformity within the community.
Mailbox color: HOAs may mandate specific colors or color palettes to ensure visual harmony.
Mailbox material: Some HOAs may restrict the use of certain materials like wood or plastic, favoring more durable options like metal or concrete.
Mailbox placement: HOAs typically dictate the distance from the property line and the height above ground.
Working with Your HOA
Review the CC&Rs: Carefully examine your HOA's guidelines to understand the specific requirements.
Communicate with Your HOA:
Reach out to your HOA board or management company to discuss your desired mailbox and any potential modifications.
Present a Well-Thought-Out Proposal: Prepare a proposal that demonstrates how your chosen mailbox aligns with the HOA's guidelines and enhances the community's aesthetic.
Be Flexible and Willing to Compromise: While adhering to the HOA's rules, explore alternative options that may satisfy both your preferences and the community's standards.
Seek Professional Guidance: Consider consulting with a landscape architect or mailbox specialist to ensure your chosen mailbox meets both HOA requirements and
USPS regulations.
Tips for Choosing an HOA-Friendly Mailbox
Opt for Classic Designs: Traditional mailbox styles often have a broader appeal and are more likely to be approved by HOAs.
Prioritize Durability: Choose materials that can withstand the elements and require minimal maintenance.
Consider Curb Appeal:
Select a mailbox that complements your home's architectural style and enhances your property's overall appearance.
Explore Customization Options:
Many mailbox manufacturers offer customization options, allowing you to personalize your mailbox while adhering to HOA restrictions.
Conclusion
While working with an HOA can sometimes be challenging, effective communication and a willingness to compromise can help you achieve your desired mailbox.
By understanding the HOA's guidelines, presenting a well-thought-out proposal, and choosing a mailbox that aligns with community standards, you can create a welcoming and stylish entrance to your home.

What to do if a Amazon truck hits my mailbox
It all begins with an idea.
If an Amazon truck hits your mailbox, there are some steps you can take to address the situation:
Ensure Safety: If the incident involves any immediate danger or potential injury, prioritize safety and call emergency services if necessary.
Document the Incident: Gather as much evidence as possible, including:
Photographs: Take clear pictures of the damaged mailbox from multiple angles. Include close-ups of any specific damage.
Vehicle Information: If possible, note the license plate number, vehicle make, model, and any company markings on the Amazon truck.
Witness Accounts: If anyone witnessed the incident, get their contact information and a brief statement.
Contact Amazon Customer Service: Reach out to Amazon customer service 844-311-0406 to report the incident. Provide them with the details you've gathered and request assistance in resolving the issue.
File a Claim: Depending on the severity of the damage and your local regulations, you may need to file a claim with your homeowner's insurance or directly with Amazon's insurance provider.
Consider Repair or Replacement: Obtain pricing for repairing or replacing your mailbox. You can also shop pricing for many different styles of mailbox www.acemailboxpost.com. Work with Amazon or your insurance company to determine the best course of action.
Additional Tips:
Keep a record of all communications and documentation related to the incident.
Be polite and persistent when dealing with customer service representatives.
If you encounter difficulties with Amazon's response, you may want to consult with a lawyer or seek assistance from your local consumer protection agency.
Remember, it's important to act promptly and gather evidence to ensure a smooth resolution process.